
You probably have everything you need for this DIY lying around the house. I’ve been laid up trying to recover from a cold-turned-sinus infection. I was able to easily complete this while “resting” in bed.
Imagine all the potential combos!
Not only is it Friday, it’s officially the first day of summer vacation around these parts. Woo Hoo!!
Some time ago I fell in love with Picnik for all my photo enhancing needs. Well, it got bought up by Google. So it is no longer. If you managed to get on there before April, you had access to all its features, including the ones that typically cost money, for free. Sadly, now its gone.
Fear not, friends! I found a replacement!
PicMonkey is my new go-to for photo editing. Its easy and doesn’t require a membership or downloading any software. I used PicMonkey to take a photo I snapped at home of my newborn and turn it into something really interesting and nearly professional.

Sharing some Friday Love! Have a great weekend everyone!

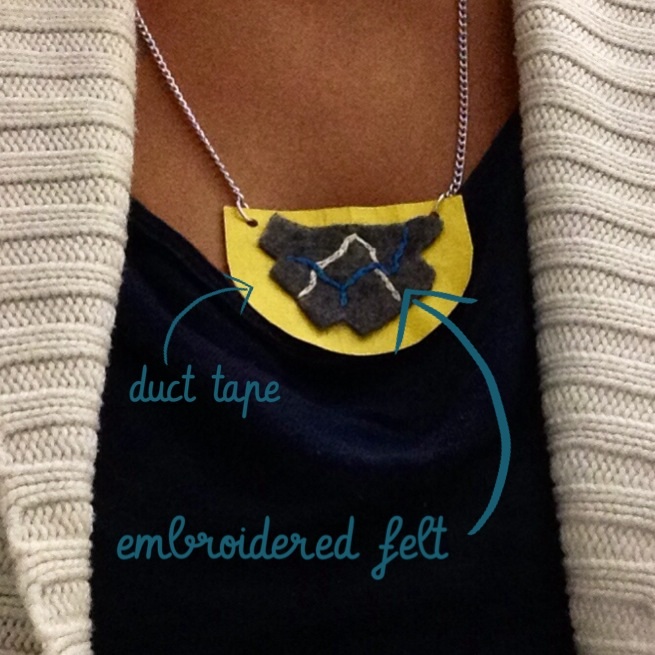
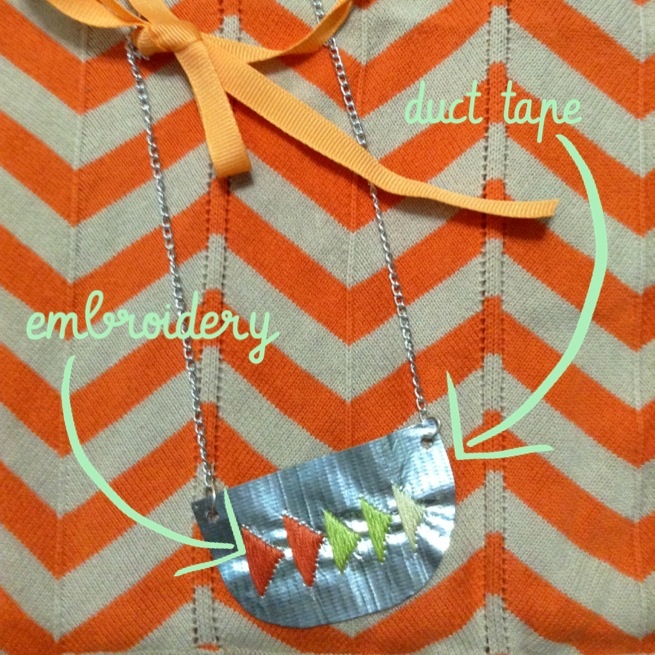
I remember as a kid noticing that the moms in my life had rings with various precious stones in them, representing the birthstones of each of their children. Some of those pieces are not really my style, but I adore the idea. I love wearing jewelry that represents my little guys.
I came across this tutorial via Pinterest and fell in love.
I immediately ran out and purchased beads and wire, a rare outing as I recoup from my C-Section. Luckily for me, making these pendants is low impact and can be done while “resting” in bed.


These are so simple and sweet that once you start you won’t be able to stop until you’ve made one for each Mama in your life! Too bad I didn’t get on the ball before Mother’s Day!
I realize this is a little late, but hey, I just had a baby!
For Mother’s Day this year, I gave my Grandmother a pretty rock ‘n’ roll bracelet. You see she and my grandfather frequent Home Depot. They have never met a project they weren’t willing to tackle.
So, when faced with a gift idea for Grandma, I went to her old stomping grounds for inspiration.
Using small door hinges and jump rings, I made her a super easy bracelet.

The best part? When she opened it, she genuinely marveled at its simplicity and said she couldn’t wait to wear it on her next trip to Home Depot. I am certain she’ll rock it while picking out new paint or flooring options!

The weather is warming up, the flowers are in bloom and I am planning to spend a lot more time outside. I’ve dusted off the patio furniture and realized I was missing something…
On one of my many recent trips to the dollar store I found a hanging plant basket like the one I used here. I know that other retailers charge more than a dollar for them so I snagged it, figuring that I’d find some good use for it…
Following this St. Patrick’s Day party I found that the approximately 33 beaded necklaces that I, my hubby and my dearest Carrie had acquired throughout the night could be put to good use by creating a hanging, beaded chandelier. I cut each necklace and strung them in two stages: (1) from the top of the chain to the top of the basket, and then (2) from the top of the basket to the bottom of the basket. I used small pieces of floral wire to attach each piece. It was pretty simple and only cost me the $1 I spent on the hanging basket.

While the beads were green, it was more of a Mardi Gras green than the Kelly green I wanted, so I did spend another few dollars to spray the whole thing a modern Kelly green.

If you need me, I’ll be outside!
St. Paddy’s Day is coming! What will you find at the end of the rainbow?

I found a sneaky little Leprechaun!
My six year old and I made this leprechaun beard with some dollar store streamers.


You can find a tutorial here.
Of course, Easter is also around the corner…So we took down a box of Peeps while we worked…

Be sure to check back next week for more St. Paddy’s Day tricks and treats! Have a great weekend!

Gone are the days of pulling out the silver to serve our guests. Well, at least for most of us! But sometimes we do need a tray to place drinks or bites. Silver wouldn’t really go with my decor anyways.
With a baking sheet, a bit of your favorite coordinating fabric, a piece of plexi, and some spray adhesive you can have a stylish tray for service.
I purchased baking sheets especially for this project. I found this set of 3 for only $9.99. I bought some fabric from IKEA and spray adhesive from my local craft store.
All you have to do is spray the adhesive according to the package directions and then place the fabric on your cookie sheet smoothing it out as you go. I used my Martha Stewart Bone Folder to smooth out any bubbles or wrinkles. The backside gets a little tricky. Think of it like wrapping a present. But lets be honest, no one will see the back side anyways!
Once its dry you can have a piece of plexi cut at your local Home Depot and drop it to protect the fabric. And bonus! If you buy the set of three you easily have two gifts ready to go!

There are a lot of great cupcake wrappers out there. Sometimes we just need something custom. Did you know that you can dye plain white cupcake wrappers?
I purchased plain white cupcake wrappers from my local grocery store, which by the way are often times cheaper since they are in fact plain. In two bowls I mixed some water with liquid food coloring drops in the colors of my choice.
") Then, one at a time, I dipped the wrappers in the water. I let them sit for a minute to soak up the color. The longer you leave them in the more color they’ll pick up.
Then, one at a time, I dipped the wrappers in the water. I let them sit for a minute to soak up the color. The longer you leave them in the more color they’ll pick up.
")
I let them dry on a wire rack with a paper towel underneath to catch any drips.
")
I let mine dry overnight, but they felt pretty close to dry after just a couple of hours. It creates a nice ombre effect as well since the very bottoms of the wrappers never touched the color.
")
We have a lot of tiny little toys. Since we got a puppy that chews on everything I have become acutely aware of this dangerous fact.

Ryan McElhinney’s pieces spoke right to me! I found these amazing works of art via Curbly earlier this week.
I immediately sifted through all the tiny army guys, action figures, and happy meal toys that we have collected over the last 5 years and found that I had plenty to work with. Once piece at a time, with hot glue I put my puzzle together. Here it is all pieced together…

Initially I was unsure about what color I wanted to paint it. But when I saw that I already had a can of glossy white paint left over from this project, my decision was easy. In all this project cost me $0.00. I had everything on hand and I bet you do too!


I think this project is great way to upcycle some old toys and avoid sending those little guys to a landfill somewhere. I will admit that my son was a little sad when he realized that he wouldn’t be able to play with these particular toys anymore, but I did my best to pull only the ones that were damaged already. There a lot of wounded veteran army guys in this lamp. Save a wounded vet, make a lamp!

If you remember, a while back I cut out many patterns so that they were ready to go when I had time. Could you believe that I finally was able to complete one tonight? 
I bought a great book called One Yard Wonders. This book as so many great ideas and patterns..all made from one yard of fabric! An amazing idea! The projects range from clothes, crafts, gift ideas, practical household items and more! The project I made was a children’s craft apron.

The material I had one hand, quilting quarters. One of the fabrics was a little thin, so I changed up the instructions and cut two apron fronts, apron backs and pocket pieces. Basically, I lined the thinner fabric so it is finished nicely front and back. I know I broke the rules by using more than a yard of fabric. While technically this is true, I still saved money! The quilting quarters were purchased on sale and I had the ribbon which was given to me. This little project cost me less than $3! 
I love that the project was so easy and I love that it turns into a tote bag when not in use! I think it makes a great homemade gift for little youngsters who like to craft or cook!
